Hello to everybody. In one of my last post I discussed about Xen and virtualization in Redhat Enterprise 5. Well at that time I was not able to configure virtual machine via the virtualization tool but after that I researched alot about this topic and finally was able to configure Xen on my Redhat Enterprise 5.
Well, I had alot of problems with Xen earlier and I like to discuss them here. My first problem was during virt-install and it was:
libvir: Xen Daemon error : POST operation failed: (xend.err 'Error creating domain: I need 262144 KiB, but dom0_min_mem is 262144 and shrinking to 262144 KiB would leave only 235124 KiB free.')I eradicated this problem by editing /etc/xen/xend-config.sxp. In this file I edited dom0-min-mem and changed it to (dom0-min-mem 128).
Now I rebooted and again tried to create a new virtual machine but this time I got this error:
libvir: Xen Daemon error : POST operation failed: (xend.err 'Device 0 (vif) could not be connected. Hotplug scripts not working.')This I figured out as a problem due to my wireless device (eth1). Problem was that the Xen created a virtual network device xenbr1 which was bridged to eth1. But virt-install was looking for xenbr0 which was not present. Soon I found xenbr0 is the default virtual network device virt-install looks for. We can though change the default but I preferred the default so I disabled my wireless (eth1) and enabled my ethernet (eth0). So this time Xen created xenbr0 bridged virtual network device and virt-install detected it.
Well virt-install is a command line tool to create a new virtual machine that I used in CUI to create a virtual machine but here I am writing the GUI way that is too easy and user friendly. But before that some configuration steps. I saw on the internet that Xen para virtualized guests can only be installed via a NFS or HTTP or FTP install source location. So I preferred the NFS way as it's too easy. I configured /etc/exports to export /dvd/actual which contained my RHEL5-Client DVD data. But I was never able to install via a NFS source. My installation always hanged. It hanged saying "Starting Install process. It will take several minutes to start.." This message comes when the final installation is about to begin (after all options are specified like Partitions, packages, passwords etc.). I never figured out a way to debug this thing so I changed my installation source.
This time I used a HTTP source. So I configured Apache Webserver for my installation source. These were the VirtualHost configuration lines:
<VirtualHost "192.168.1.5:80">ServerAdmin root@server.example.com
  DocumentRoot "/dvd"
  ServerName server.example.com
  ErrorLog logs/server.example.com-error_log
  CustomLog logs/server.example.com-access_log common
</VirtualHost>
So my HTTP source now was http://server.example.com/actual. Great so let's get started.
First of all I booted the Xen enabled kernel. Here is my Xen enabled kernel lines of grub.conf:
title           Red Hat Enterprise Linux Client (2.6.18-1.2747.el5xen)
root            (hd0,5)
kernel          /boot/xen.gz-2.6.18-1.2747.el5
module          /boot/vmlinuz-2.6.18-1.2747.el5xen ro root=LABEL=/ rhgb quiet
module          /boot/initrd-2.6.18-1.2747.el5xen.img
Note that I specified no dom0_mem= variable in kernel line. All was handle via dom0_min_mem in /etc/xen/xend-config.sxp.
See I understand what all this means but I am hiding all these details so that this thing becomes easy.
When my Xen enabled kernel booted the xend service started automatically. See we need xend service to get started successfully if we want to create a new virtual machine via Xen.
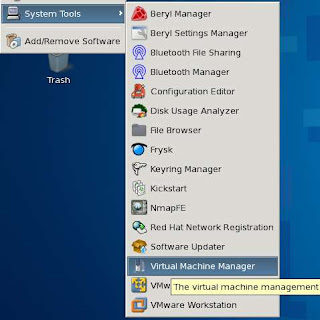
Now I started Virtual Machine Manager present in Application -> System Tools.
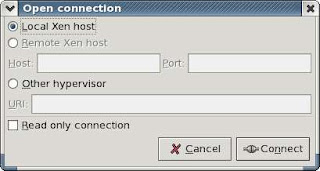
In this window select Local Xen Host and Click on Connect. Note this window helps us to connect to a remote host that is running Xen. Very useful !!
So here's how the Virtual Machine Manager looks. Note here that right now I am running the host domain0 only so only that is shown but we will create a new domain (domainU) soon.
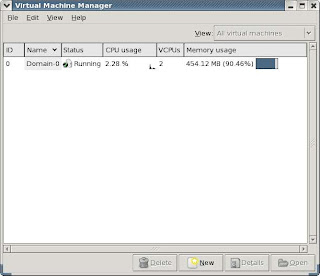
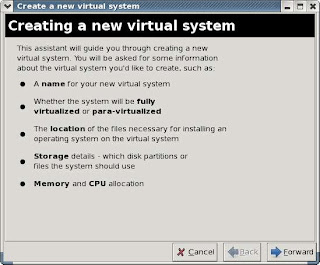
So after clicking the New button the Create Virtual Machine wizards starts. This wizard asks some input regarding the new virtual machine and finally creates it.
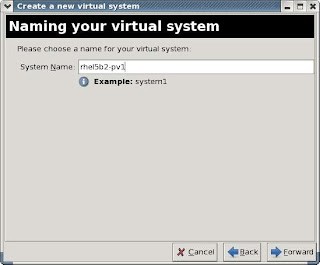
First of all it asks the name of the virtual machine. I gave rhel5b2-pv1 (Redhat Enterprise Linux 5 beta2 para virtualized 1).
Now the wizard ask about the virtualization method. We select para-virtualization (unique point about Xen). Para virtualization is what I have configured till now and it's working I have not tried full virtualization (will try it soon with Windows XP guest).

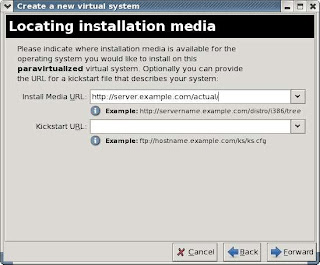
In this step the wizard ask about the installation source. Two options are provided I choosed the first one and specified my installation source http://server.example.com/actual (I have DNS and APACHE configured on my system).
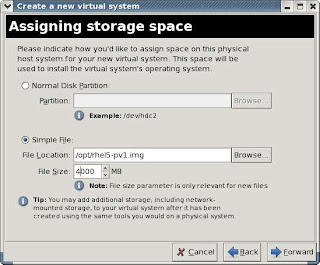
In this step the wizard ask about the storage. How the virtual machine is going to be stored on the disk. I choosed the file way and specified the file as /opt/rhel5b2-pv1.img and size 4GB.
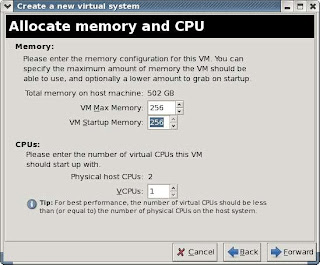
In this step the wizard asked about the memory I want to give to the virtual machine. I gave 256MB to my RHEL5 virtual machine. Note the GUI was a little buggy in showing my system memory as 502 GB instead of 502 MB (LOL). Also in this step the wizard asked about the VCPU which I specified 1 (I have centrino duo).
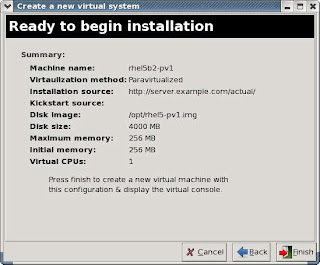
This was a summary of all the options specified earlier by me. Finally I clicked Finish Button.
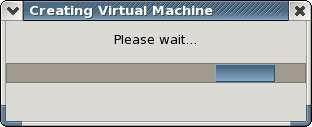
This little window showed a progress bar and behind the scene it was creating a virtual machine. It was also establishing a VNC connection so that I can see the installer in a window in my host OS.
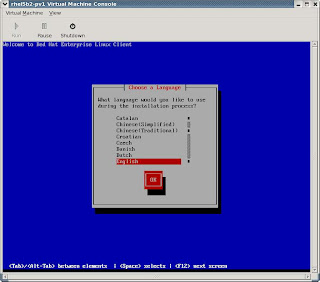
So this was the window I was shown with. This is the first screen the window showed to me. After that the anaconda installer started. Asked me the partition layout, root password, time zone, network configuration and package selections.
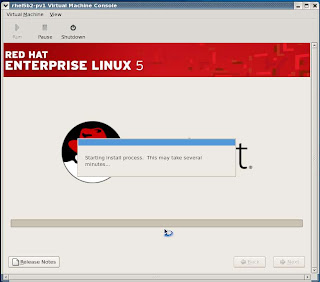
Finally when all configuration was done the install process started. This is just before it started (I captured this screen because with my NFS installation it hanged during this process).
The installation finished in about 20 minutes as it was a very minimal installation around 940MB. No X-window no GNOME just pure Console. When the installation finsihed it rebooted and showed nothing I had to select Serial Console from the View Menu (Virtual Machine Console) and it showed me the login prompt.
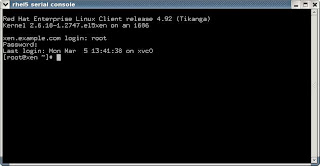
Using this console I logged in to my virtual machine and used it. LOL.
When I was finished with all this I shut down the virtual machine and did somethings. First of all I saw that my dom0 (default domain) which was compressed to use 212 MB RAM when my virtual machine was running still used 212 MB. Performance was slow. I need to give it the whole RAM now but how I do that. Well I figured out a way (searching internet):
In command line
virsh
Inside the virsh prompt
virsh # connect
virsh # setmem Domain-0 500000
The first command connects virsh to the local hypervisor and the second command sets the memory of Domain-0 (Domain Name) to 500MB. To see the name of your domain issue list command inside the virsh prompt.
Now I wanted to start my virtual machine automatically during next boot up. This is how I did it.
cd /etc/xen/auto
ln -s ../rhel5b2-pv1 .
What I did here was I went to /etc/xen/auto and created a symlink to my /etc/xen/rhel5b2-pv1 file in this directory. /etc/xen/rhel5b2-pv1 was the Xen configuration file for my virtual machine. And if I want to start my virtual machine during every boot up I need to place a symlink for it's config file in /etc/xen/auto. This symlink is read by xendomains service. So I
chkconfig xendomains on
So the service get's started at every bootup.
When you don't want to use the virtual machine just do this
service xendomains stop
But if you want to assign all the physical RAM after this to the default domain you have to again call virsh and do what I told earlier. I need to figure out a easy way to do this (hack the /etc/init.d/xendomains script maybe).
Well this was it and hope you also got Xen installed and configured in your linux. I was specific about the OS that is Redhat Enterprise Linux 5. Virtualization is alot easier in RHEL5 and hope to see more in the final release of RHEL5.
What Redhat guys have done is that they have used a API called libvirt that talks to Xen. libvirt is simply great written in C language having bindings for Python and Perl. This API helped them to write the simple yet powerful GUI 'virt-manager' for configuring and managing the virtual machines. They are doing great work at Redhat Emerging Technology. I have also tried the new virtual machine manager (GUI) and they have included alot more options in it (latest release is 0.3.1). Hope to see the new Virtual machine manager in Final release of RHEL.


